My Raspberry Pi 5 in Headless Mode
Published on 2024-08-31
IoTJust a quick guide to kickstarting Raspberry Pi adventure from scratch - no monitor needed! 😗
A. Requirements
- Raspberry Pi
- A power supply for the raspberry pi
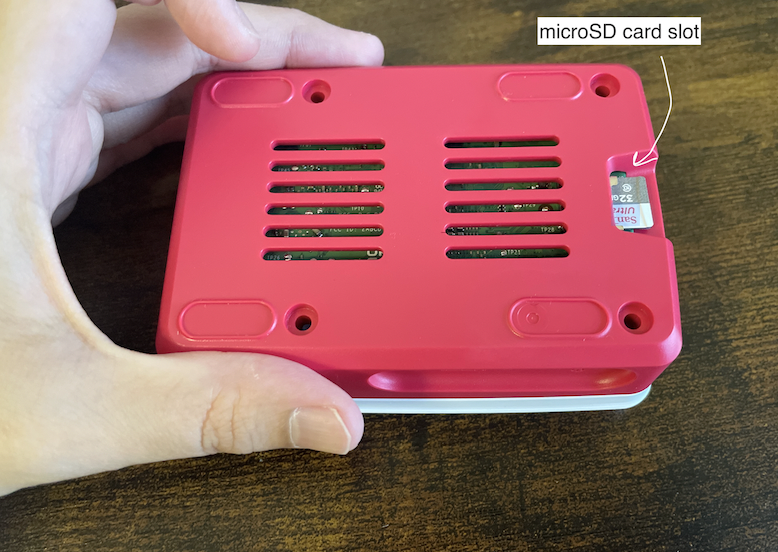
- Boot media (mine is a microSD card 32GB)
- a computer with the microSD card slot
I don't have a monitor or an extra set of keyboard, so, I have to configure my Raspberry Pi headless.
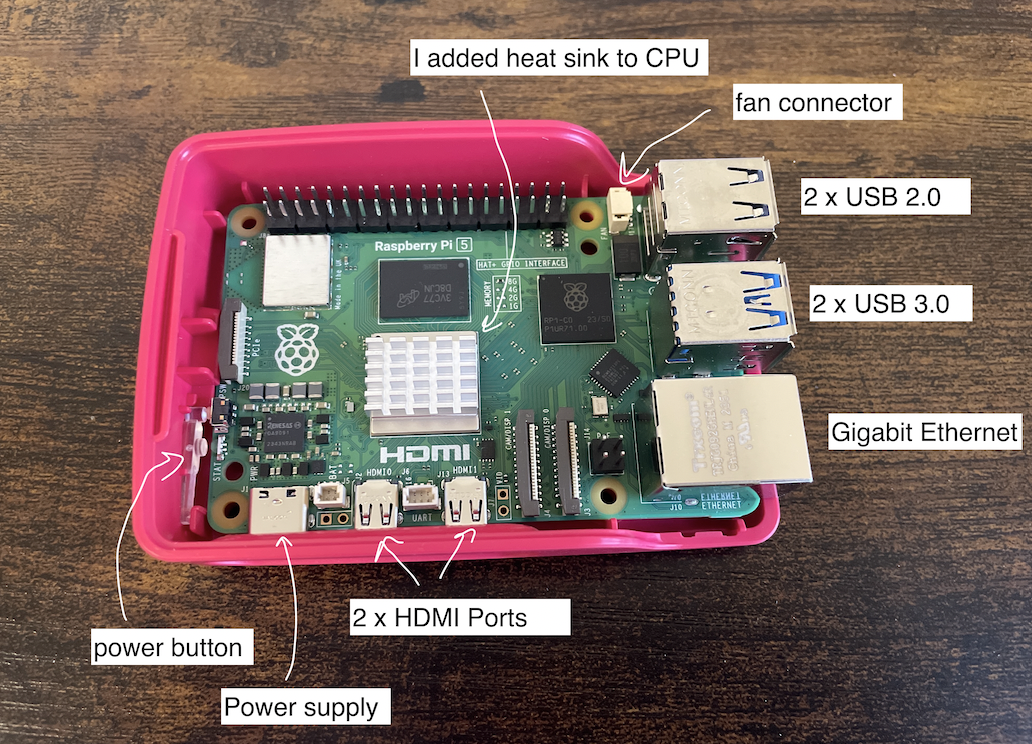
B. Installation an OS in the boot media
To use Raspberry Pi, we need an operating system. By default, Raspberry Pi automatically boots from the microSD slot when the slot contains a card.
First, install an operating system in the boot media (in our case, it's the microSD. it can be any storage devices). What we need to install an OS in the boot media: - Raspberry Pi Imager: a tool to help download and write images to the storage device. - a computer where we can install and use Raspberry Pi Imager - microSD card slot in that computer
Alternatively, we may be able to install an operating system directly to Raspberry pi from the internet (I haven't explored this option). But it requires a monitor, a keyboard and a wired internet connection.
Installation an OS in the boot media with Raspberry Pi Imager:
- Install Raspberry Pi Imager in local computer
- Launch Raspberry Pi Imager
- Choose device: Raspbery Pi 5, Choose OS: Raspberry Pi OS Bookworm (64-bit), Storage: our SDCard. Click Next.
- Use OS Customisation:
If we chose to skip OS customisation in Imager, Raspberry Pi will run a configuration wizard on first boot to configure the login credential, wifi, hostname, keyboard, etc. Since, we are setting up a headless Raspberry Pi, we need to preconfigure the OS customisation. OS customisation menu lets us setup Raspberry Pi before first boot.
[General]
We need username and password, and of course, Wi-FI to remotely connect to our Raspberry Pi. Let's configure these.
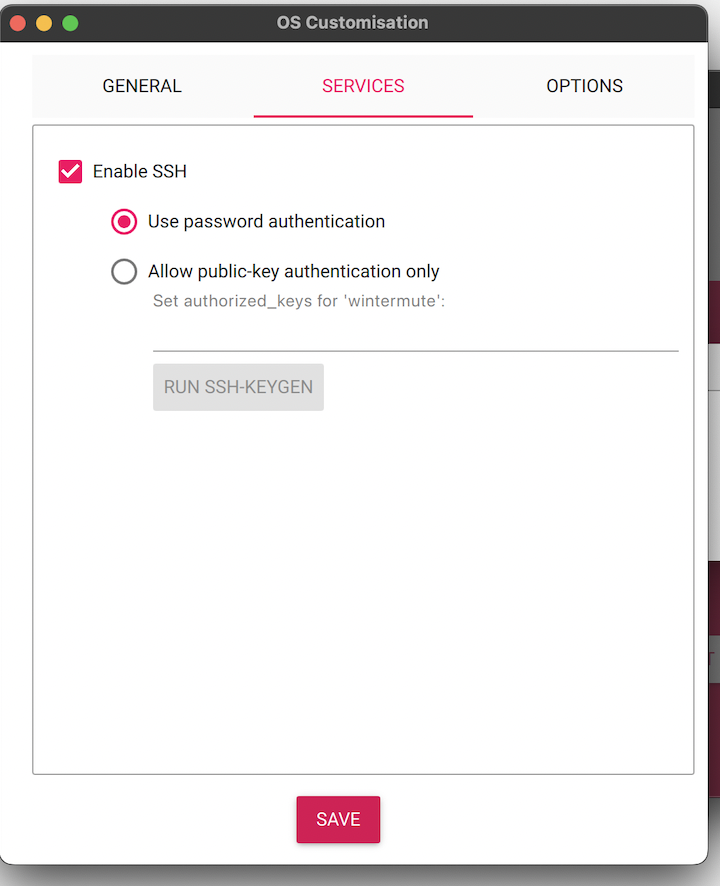
 [Services]
We want to be able to SSH into our Raspberry Pi. Let's enable this. We will go with password authentication for the first SSH connetion. Later, we are going to change it to Public-key authentication.
Once done, we can insert our microSD card into Raspberry Pi and let it boot from the SD.
Note: I had to update the bootloader because, for some reasons, my Raspberry Pi won't boot up from SD card. Basically, I had to rewrite the microSD card with Boot Loader configuration information, and explicity states the configuration to read from SD. Here is the online instruction. Then, I inserted the microSD card to Raspberry Pi, and let it get the config from the microSD card for a good 5 mintues. Then, I shut down the Raspberry Pi, and rewrote the microSD card with Bookworm OS. After that, I was able to boot up Bookworm from my Raspberry Pi.
Verifying the connection
From terminal, ping to the the ip address of raspberry pi to verify raspberry pi has booted up the OS and connected to the Wi-Fi. We can find the ip address of raspberry pi from the network router. Router’s IP address is usually 192.168.0.1. Log in with the router’s credentials, and see the section listing all devices currently connected to the network, including their IP addresses, MAC addresses, and sometimes device names.
C. SSH-ing into Raspberry PI
For windows, use puTTy. (Not going to explore further into this. I am using macOS.) For macOS, enter below command in the terminal.
ssh [username]@[hostname].local OR ssh [username]@[ip_address].localhostname = the hostname setup during the preconfigure of OS customisation
ip_address = the ip address Raspberry Pi is on. We can find this by logging into the router
In the next section, we are going to enable the VNC. Why we want VNC? to be able to control our Raspberry Pi with GUI. It's easier than using command lines. But, to each its own, there are pros and cons. After that, we are going to change our SSH authentication to Public-key authentication from Password authentication.
D. Enabling and connecting over VNC
After ssh-ing into Raspberry Pi, we can configure the raspberry pi configuration.
-
Enable the VNC in the Raspberry Pi by
sudo raspi-config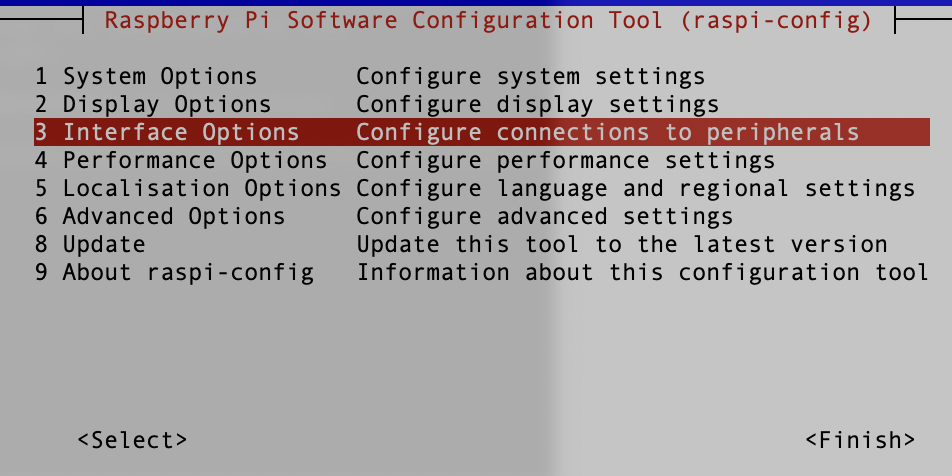
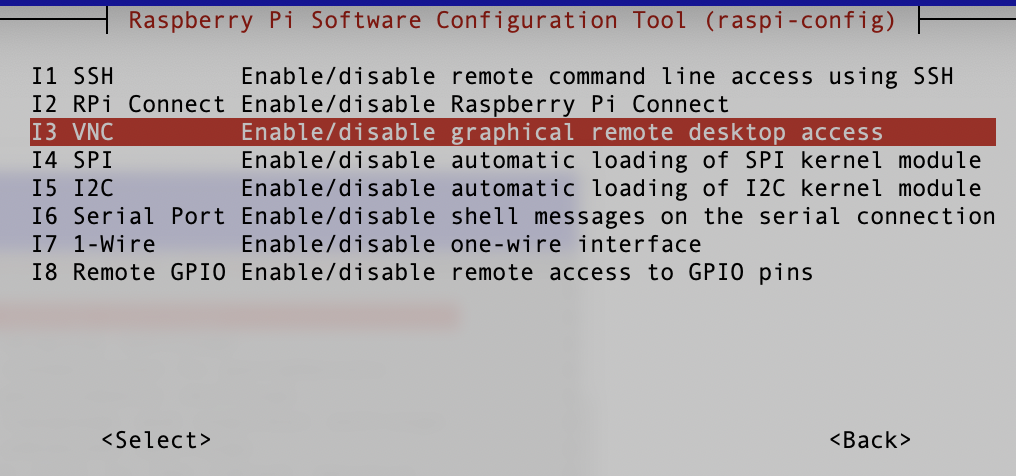
-
In local machine, download, install and launch TigerVNC. Note: the latest VPN connection to Raspberry Pi 5 only works with TigerVNC due to security updates.
- In TigerVNC, enter the hostname of Raspberry Pi. And viola.

E. Changing to Public-key authentication for SSH-ing into Raspberry Pi.
Public-key authentication is more secure because it uses cryptographic keys instead of passwords. Even if someone intercepts SSH traffic, they won't be able to log in without the private key. Note, below instruction is written for command line interface. Of course, this can also be done with GUI, now that we have already setup VNC. ;)
- Generate SSH Key pair in local machine. In macOS terminal, enter:
Follow the prompts to save the key pair (it is usually in ~/.ssh/ssh-keygen -t rsa -b 4096`and ~/.ssh/ .pub). I, however, created the key pair with the name 'pi'. Enter the passphrase when prompted. This passphrase is used to verify and log you into the remote server which is our Raspberry Pi. - Copy the public key to raspberry pi. The syntax of the transfer file command is
scp <source> <destination>. Therefore, we need to do:scp <path_to_file> [username]@[hostname].local:<path_to_destination>. scp will log into the remote server, copy the file, then log out again in one process, so just run it from a shell on local machine. There is no need to ssh into the remote server.
Above command login to Raspberry Pi, copy thescp pi.pub > [username]@[hostname].local:~.pub and place it into Raspberry Pi home directory. ~ denotes the home directory. - In Raspberry Pi, enable the Public-key authentication and disable the password authentication.
a. SSH into raspberry pi with username and password:
b. create the '.ssh' directory and 'authorized_keys' file:ssh [username]@[hostname].local OR ssh [username]@[ip_address].local
c. copy the content of themkdir -p ~/.ssh mv pi.pub ~/.ssh cd .ssh touch authorized_keys.pub file and pipe it to authorized_keys file.
d. set the permission of the folder and file:cat pi.pub > authorized_keys
e. cd back to the home directory.chmod 700 ~/.ssh chmod 600 ~/.ssh/authorized_keys
f. Now, we are going to modify the sshd_config of the raspberry pi. Enter below command:
Change "#PubkeyAuthentication yes" to "PubkeyAuthentication yes"sudo nano /etc/ssh/sshd_config`
Change "AuthorizedKeysFile .ssh/authorized_keys .ssh/authorized_keys2"
Change "#PasswordAuthentication yes" to "PasswordAuthentication no"
Save and exit the nano. Then, restart the ssh for the changes to take effect:
g. The last step is to verfiy the Public-key authentication works. By default, the SSH client looks for private key files in the ~/.ssh directory on your local machine. The most commonly used key files are ~/.ssh/id_rsa (RSA key)sudo systemctl restart ssh
~/.ssh/id_ecdsa (ECDSA key)
~/.ssh/id_ed25519 (Ed25519 key)
But since I am using a different name than id_rsa, I have to explicitly state the key file location. From local machine, enter the command:
ssh -i ~/.ssh/pi [username]@[hostname].localWhen prompt, enter the passphrase to ssh-ing int the raspberry pi. And, we're done! SSH-ing with Password authentication should not work anymore. 😎
